
Francisco Javier Cruces Doval
Thursday, March 28, 2024 | 3 minutes
VPN site to site with IPsec Fortinet
In this post I will mount an IPSEC VPN using Fortinet firewalls, for which I will visualize them on GNS3.
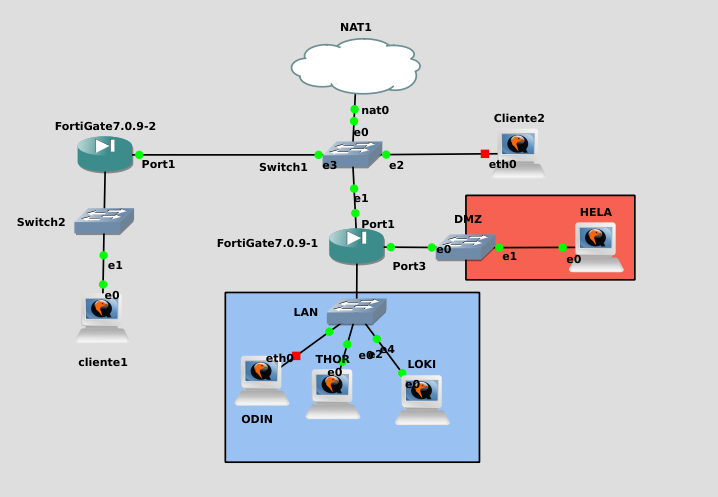
Stage preparation
To create the VPN I will add a new Fortigate to the stage.
So let’s proceed to set it up, the first thing will be to know the IP that the DHCP has given you:
FortiGate-VM64-KVM login: admin
Password:
You are forced to change your password. Please input a new password.
New Password:
Confirm Password:
Welcome!

FortiGate-VM64-KVM # get system interface physical port1
== [onboard]
	==[port1]
		mode: dhcp
		ip: 192.168.122.22 255.255.255.0
		ipv6: ::/0
		status: up
		speed: 1000Mbps (Duplex: full)
		FEC: none
		FEC_cap: none
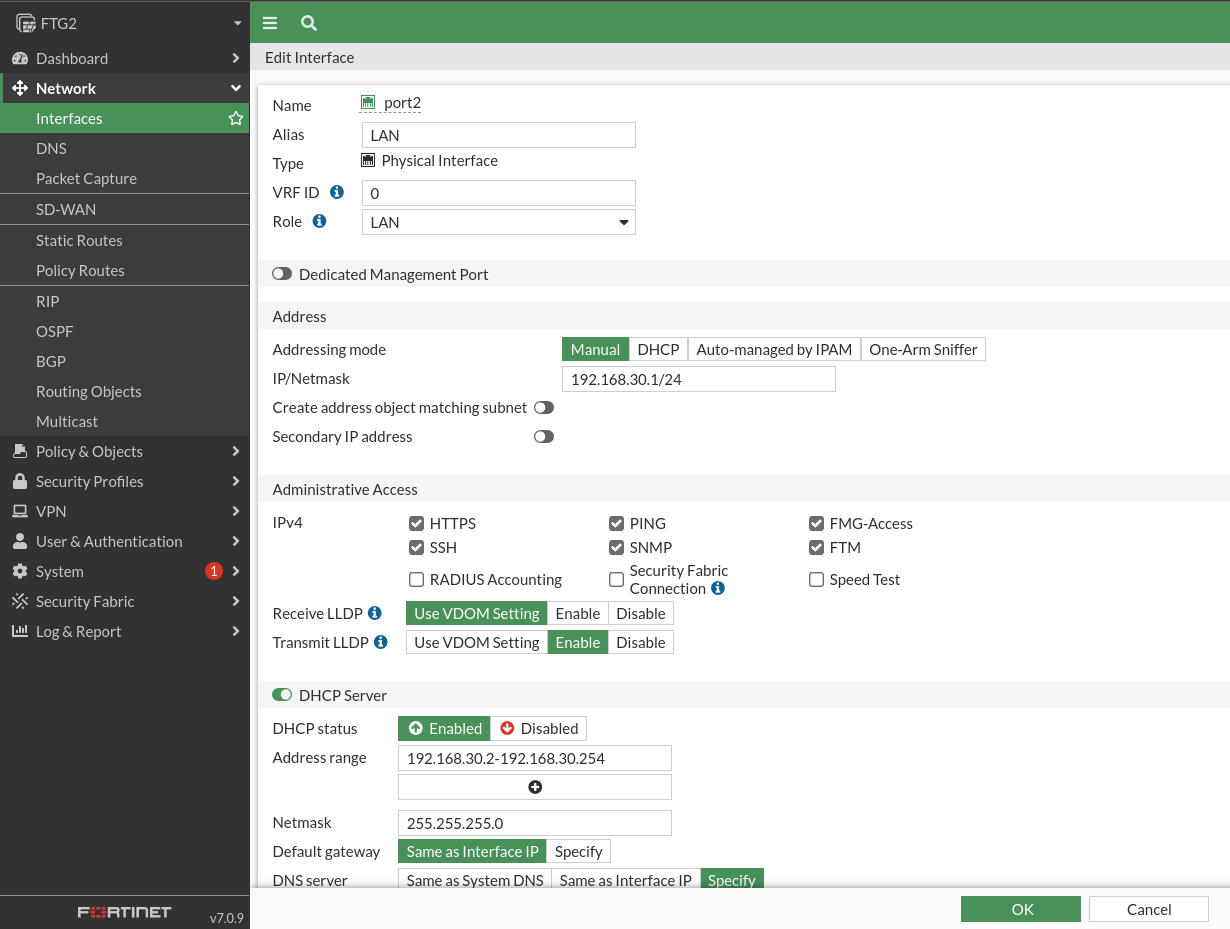
This IP you’ve given me for DHCP will be configured as static.
As for the local network of the new FortiNet, it will have the network 192.168.30.0:
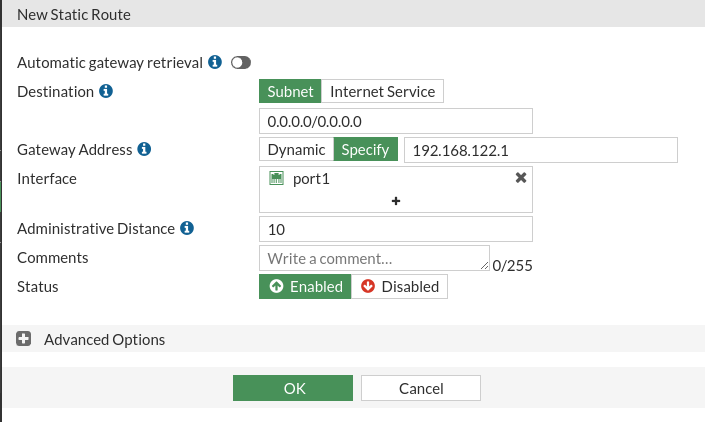
Finally, in this the default route to the NAT cloud IP address will be set at 192.168.122.1 / 24:
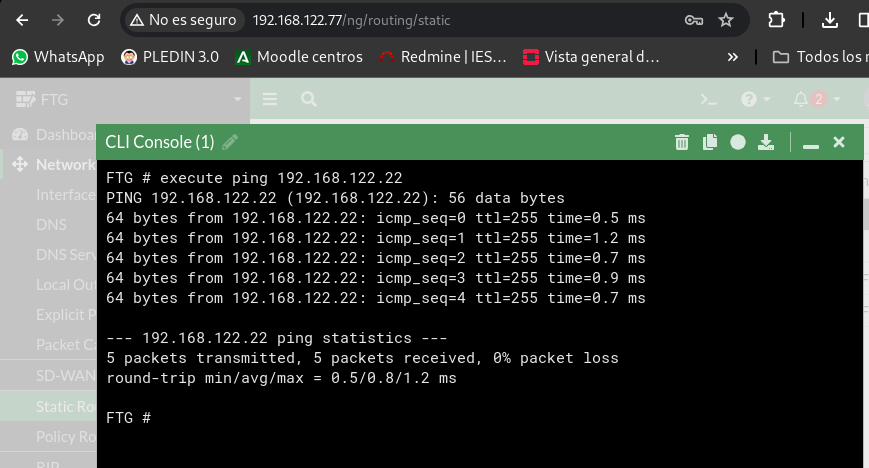
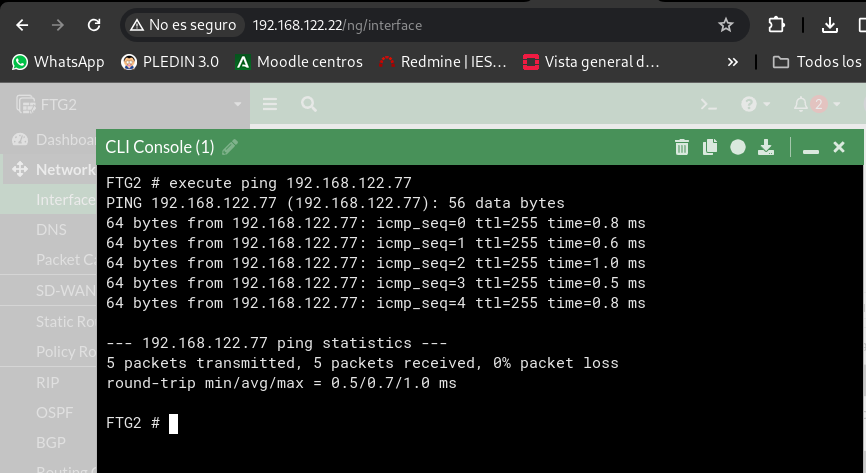
Once this is done we will see that we have connectivity between both firewalls, from FGT – > FTG2:
And the reverse from FTG2 – > FTG:
VPN site to site
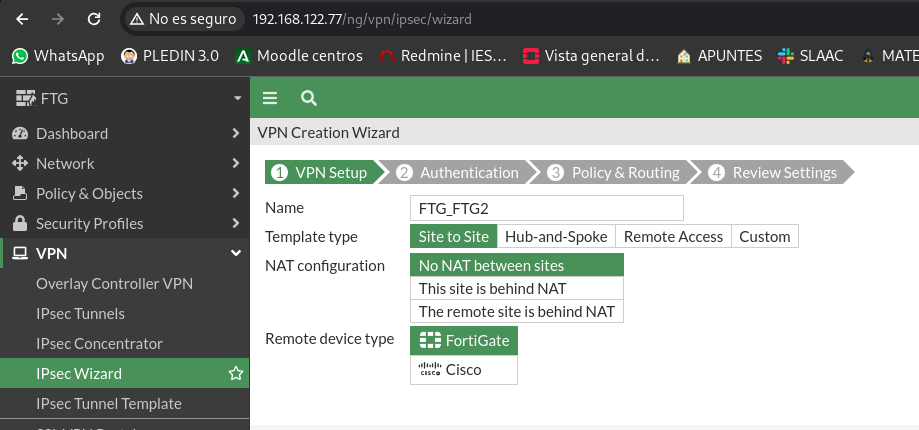
We go first to the FortiGate FTG which contains the clients of Odin, Loki, Thor and Hela. And we’ll go to IPsec Wizard, I’ll give you a significant name with the name of the hosts:
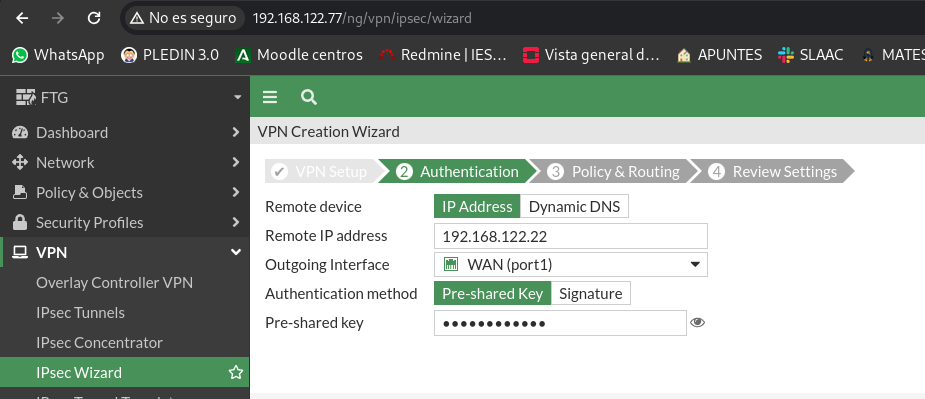
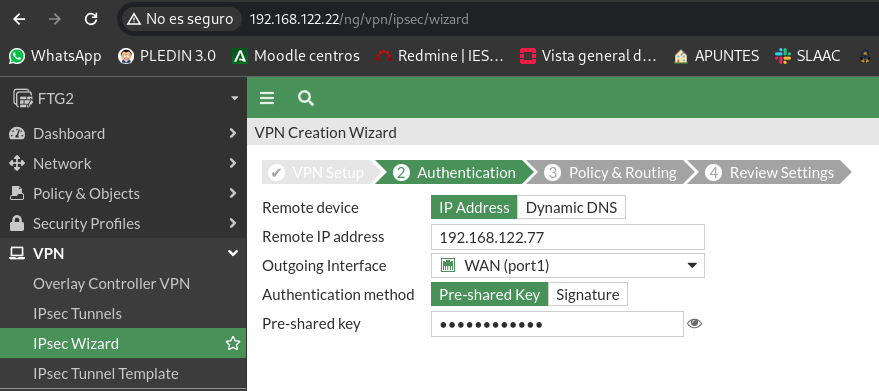
In the next step we will indicate the IP of the FortiGate FTG2, the interface through which the traffic will come out and finally a shared “key” between the two ends, this latter part can be replaced by certificates:
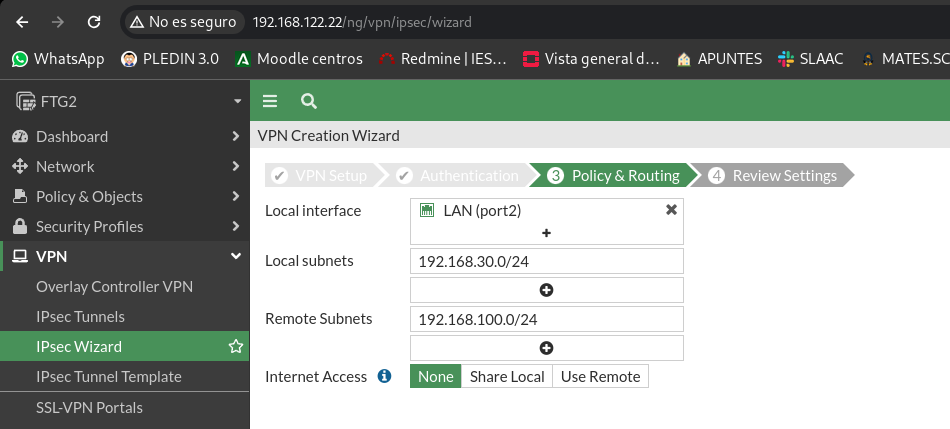
Here are the local networks at both ends where we want to have connectivity:

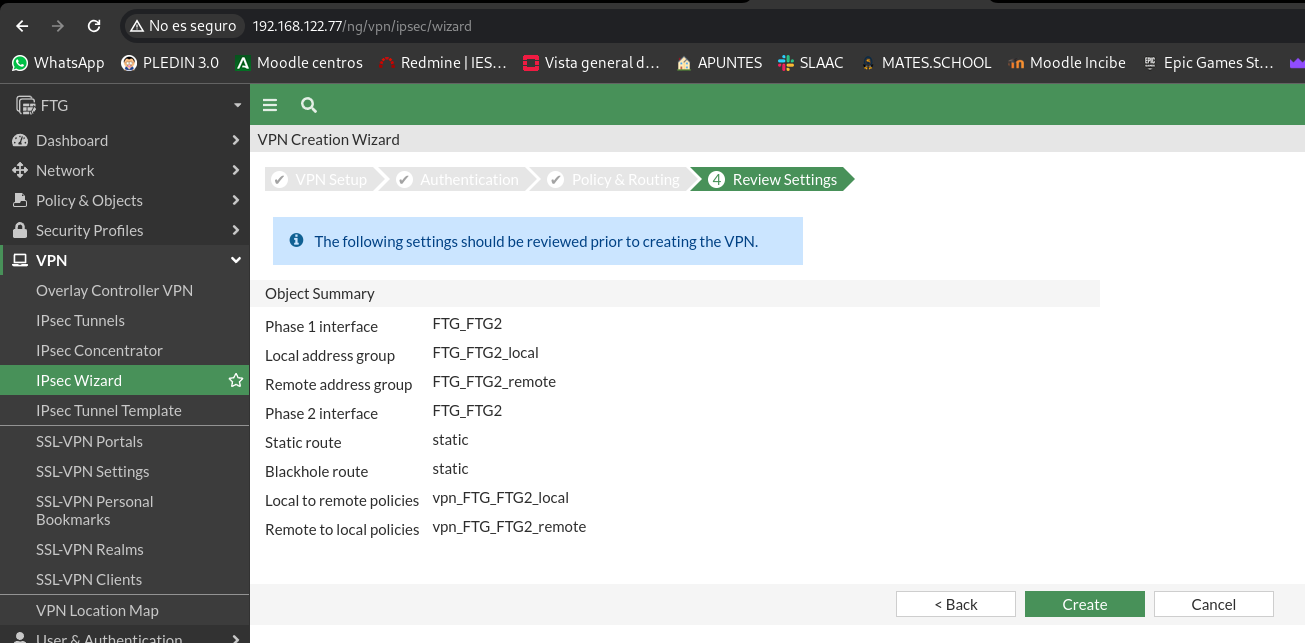
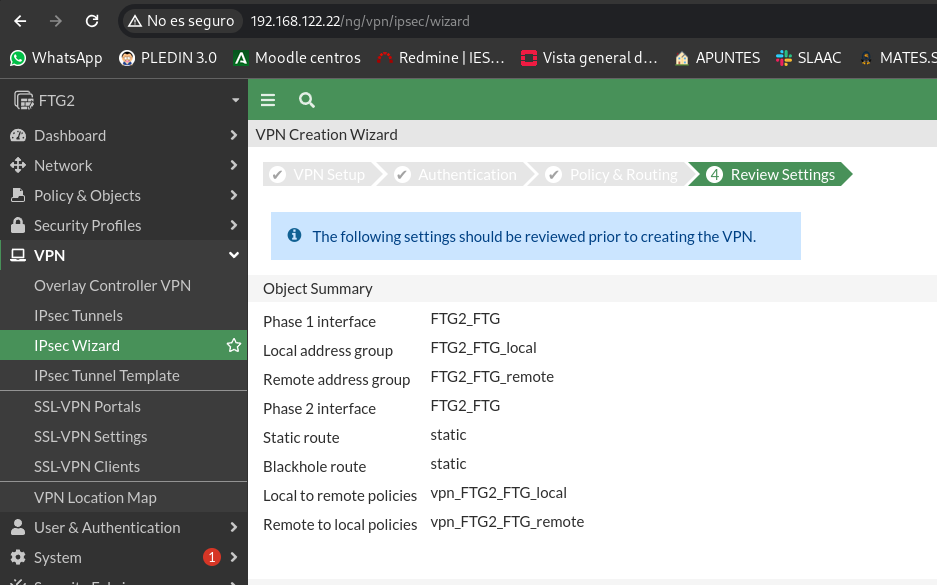
We will get a panel with the different objects that will be created and we will give you to create:
We will repeat the same process in the other Fortigate, create a tunnel site to site:

We’ll tell you the public IP at the other end and we’ll put the same shared key:
Now we’ll tell you what our local network is and the remote network is:
Finally he will tell us the objects that are to be created and we give him to create:
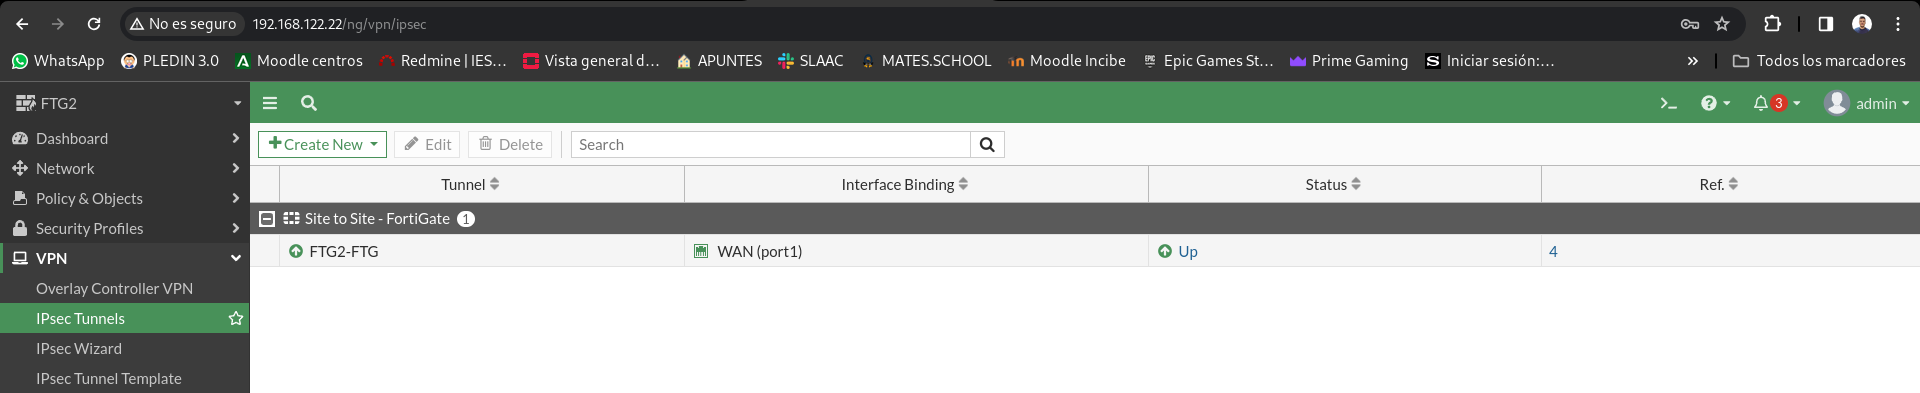
Now if we access the IPsec Tunnels panels, we’ll see both tunnels rise in a few seconds:

Operating check
Once we reach this point we will see that the VPN is working. We can do a ping in both directions:
debian@cliente1:~$ ping 192.168.100.4 -c 1
PING 192.168.100.4 (192.168.100.4) 56(84) bytes of data.
64 bytes from 192.168.100.4: icmp_seq=1 ttl=62 time=1.22 ms

--- 192.168.100.4 ping statistics ---
1 packets transmitted, 1 received, 0% packet loss, time 0ms
rtt min/avg/max/mdev = 1.220/1.220/1.220/0.000 ms

debian@thor:~$ ping 192.168.30.2 -c 1
PING 192.168.30.2 (192.168.30.2) 56(84) bytes of data.
64 bytes from 192.168.30.2: icmp_seq=1 ttl=62 time=1.52 ms

--- 192.168.30.2 ping statistics ---
1 packets transmitted, 1 received, 0% packet loss, time 0ms
rtt min/avg/max/mdev = 1.516/1.516/1.516/0.000 ms
As we see we have connectivity between the 2 private networks through the VPN.
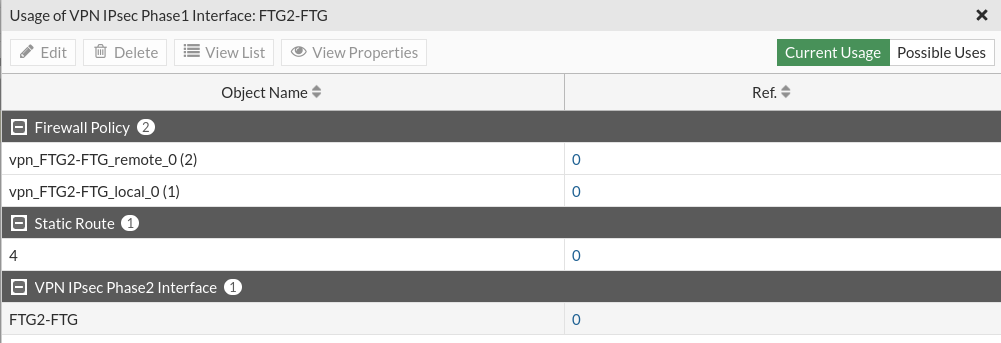
If we stop to see the objects that each tunnel has created for us, it has created a total of 4, which we will have to delete if we want to remove the tunnel:
By default the policy that has created us allows ALL traffic in both directions, these 2 policies have created it in each firewall and by modifying these or adding new ones we can limit the traffic that passes through the VPN according to our needs.

In addition, we will have created a route to direct traffic to the private network at the other end:
