
Francisco Javier Cruces Doval
Wednesday, September 20, 2023 | 20 minutes
Active Directory in Ubuntu
In this post, we will explore how to set up an Active Directory environment on an Ubuntu server using tools such as Kerberos and Samba. Active Directory is an integral Microsoft solution for identity management and access control in business networks. Through this guide, we will learn step by step how to implement a Ubuntu server as a domain controller, establish Kerberos-based authentication and configure directory services by using Samba.
Introduction
You want to set up a Linux server (Ubuntu Server 20.04 LTS) to service a set of client equipment (Windows and Linux).
I will take advantage that the stage is mounted from previous class activities and I will restore the snapshots to have the clean machines.

Preparation of the environment
1. The Linux server will not have a graphic environment. You will have at least the partitions: root, home and exchange.
Here we can see that I have no graphic environment installed, we can see that the service is active, however, no environment is launched. Also, if we look for any process with the best known desktop names, it doesn’t give us any results.
Here I show you the partitions that my Ubuntu server has (root, boot, home and swap):

#2. The server must be prepared for remote administration (from now on all management will be done remotely from another network equipment).
To manage it remotely I will use ssh, for this we install it on the server:

Once it is installed we will have it running, no configuration is necessary.
If we check the service status we can see that you have taken the default configuration:

To connect remotely we will need to know the IP of the equipment or the name:
In my case I will connect from the external network to our server (enp0s3), we have previously configured the network with netplan:
And we have implemented the changes:


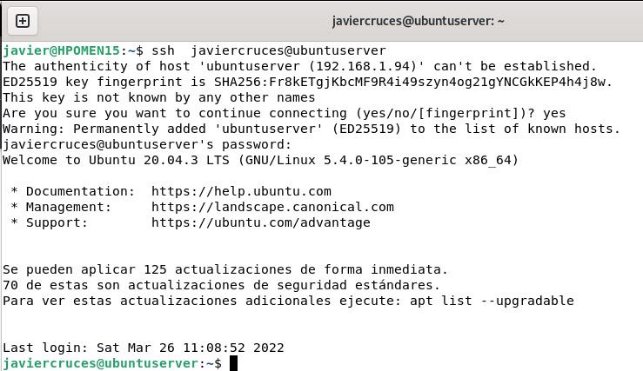
Once we know this data we will connect by ssh from a machine in our network to follow with the other sections, in my case I will use my host machine, for this I have installed the openssh-client package previously:
#3. Create the following users and groups
- Groups: teachers, students, smr, asir. I believe the groups:

- User to create: profedesiree, profejose, proferaul, erik, manu, olive, sandra, fabio and domi
I believe the users:

I created them with home directory and assigned them the 1234 password:

- Teachers: profedesiree, profejose and proferaul. We add them:

We can check that they have been added with the following command:

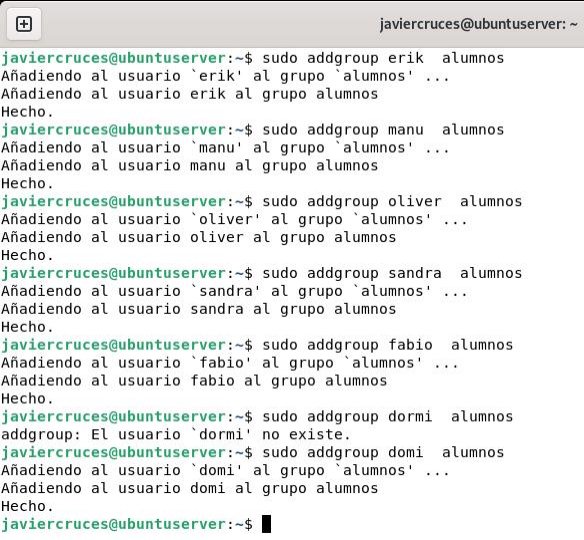
- Students: erik, manu, olive, sandra, fabio and domi.
We add them:

We check that they have been added:
- Users of the group smr: profedesiree, profejose, proferaul, erik, manu and olive.
We add them:

We check that they have been added:

- Users of the asir group: sandra, fabio and domi.

We check that they have been added:

4. All users will be Samba users. For this we must have installed samba:

To add a samba user we must enter the following command and assign a password:

We will do this with the 9 users, once added we can use this command to list the samba users we have:

Samba domain controller
5. Create and configure a Samba domain controller on the Server.
Before starting the installation we must take into account a number of data:
- Active Directory * domain controller name: FJCD
- Name of the domain of * Active Directory *: javiercrucies.local
- Name of the Kerberos Kingdom: javiercrucies.local
- NetBIOS name of the domain: javiercrosses
- Fixed IP address of the server: 192.168.0.1
- Server role: Domain Controller (DC)
- DNS Reporter: 192.168.0.1
Once with these clear data we will start with the installation, the first thing is to update the system:

Next we will need to change the name of our server to be in line with the data we have selected before, for this I have selected my initials, for this we edit the file * / etc / hostname *:


Now we need to reboot the equipment to apply the changes, we will lose the connection by ssh:

Let’s take the ssh remote control back in a few minutes when you have restarted:

As you can see we have connected using the old name that our server had, this is because the / etc / hosts file, contains an IP address ratio with its corresponding logical names. This file contained a reference to the old name of the server itself, which we will change to refer to the new name:

Once we have applied these two changes, before we continue we would only have to make sure that our server has the network properly configured. In our stage we have two network cards on our server:
- enp0s3 (External card, gives us internet access)
- enp0s8 (Internal card, is the one that communicates with our local network)
Because of this the first is configured by DHCP, as we do not care about the configuration that is assigned to it, however, the second is configured statically, as we must control the configuration of it so that we have control over it and then join the equipment to the domain.
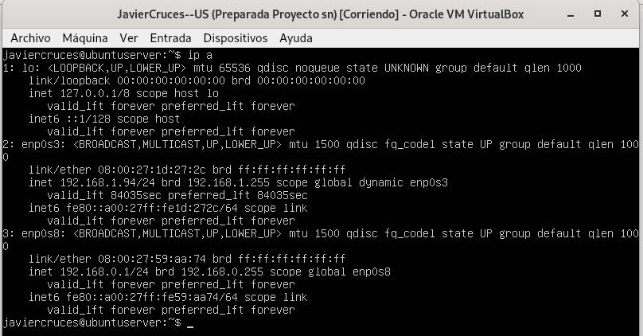
Once this is clarified, at the beginning of the document I indicate how the interfaces are configured, here I leave a screen to remember the addresses:
We will now need to have some packages that must be installed before starting, these are:
- samba: file server, printing and authentication for SMB / CIFS. smbclient: command line customers for SMB / CIFS.
- krb5-config: Configuration files for Kerberos Version 5.
- winbind: Service to solve information about users and groups of Windows NT servers.
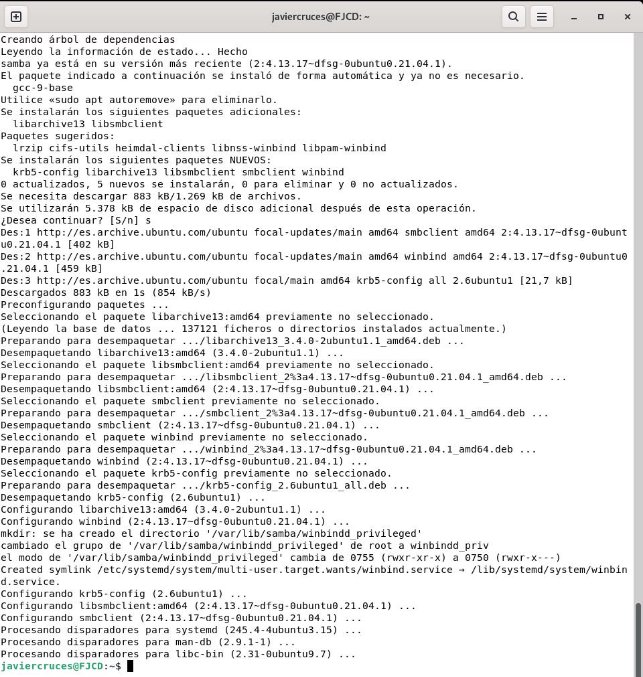
We can install these four packages with a simple command:

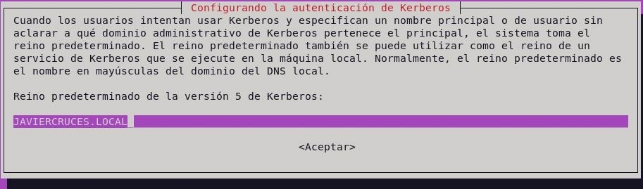
Kerberos, will ask us about the kingdom (domain name) during the installation of the packages, in our case it will be javiercrucies.local:
Here we will enter the name of our server team:

Here we will re-enter the name of our server:

After this, the installation will continue a little further, but without need for more information:
We will now configure samba, but before we do so we will change the name to the * smb.conf * configuration file so that you do not use it while we configure it and so we will also have a copy of the original file:

We will use the samba-tool domain provision command, so that it is the command itself that requests the values you need and, where possible, suggests its default values. So, if these match those we expect, it will be very likely that the previous steps have been the right ones:

As you can see, it is very intuitive to do so, since except for the forwarder IP and the administrator password we have chosen the answers that the same command offers us. This must meet minimum complexity requirements:
- at least 8 characters
- 1 capital
- 1 number or symbol
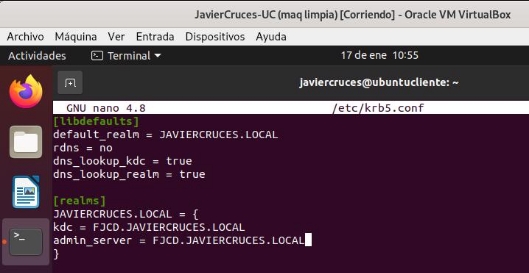
This, in addition to setting up Samba, has generated a configuration file for Kerberos on the route / var / lib / samba / private / krb5.conf. So we’ll copy it to / etc:

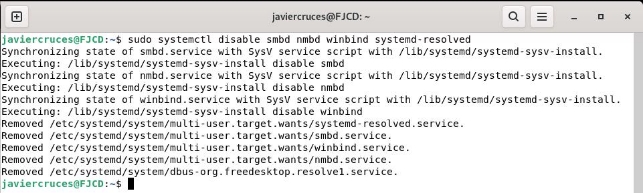
The following will be to configure the resolution of names, for this we will start by stopping the services involved:

We will also remove them from starting automatically when restart the equipment:
We will then make sure that the samba- and ad- dc service can be started without difficulty, avoiding any masking that may exist:

Then we delete the resolv.conf file which, in fact, will be a link to stub-resolv.conf. So we eliminate it and create a new one to remove it:

We now introduce the right values according to our domain, for my case:

We save the changes and get out of the file.
We will start the samba-ad@-@ dc service and enable it to start when restart the equipment:

Check the installation
If we have managed to get here, we have all the ballots so that our installation has been correct. But it’s never too much to do a few checks.
Consult the domain level and create a new user
To know our domain level we simply enter this command:

In doing so, we check that the level of the domain, and of the forest where it is located, is equivalent to a Windows Server 2008 R2 installation
We will try to create a new user account in the domain with the command (we will need to take into account password policy):

Confirm that the DNS server works properly
The first thing is to check the LDAP service on the TCP protocol, for which we will write the following order:

If we have an answer similar to that, it all works as it should.
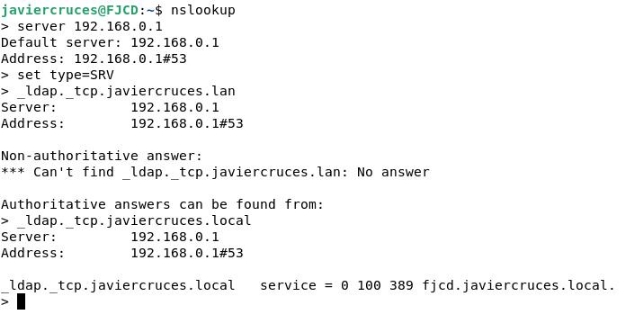
We will then check the SRV record for the Kerberos protocol on UDP, for which we use the following order:

The answer must be similar to the previous one, if so SRV record is correct.
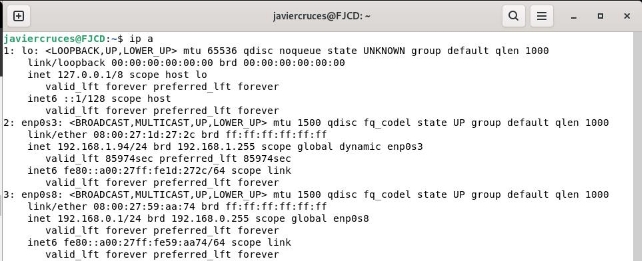
Finally, we check the resolution of the name of our server:
Check the operation of Kerberos
To check the operation we can, for example, use the smbclient command to check the services that a particular user can get. For this we will use the following command:

If authentication is correct, we’ll know Kerberos is doing his job. If we want, we can even log into the server using the administrator account. To achieve this, we will use a syntax like this:

We’ve already checked everything so we can start joining customers to our domain.
Join the domain
#6. It integrates at least one Windows client into the Samba domain.
Windows client
The first thing we will do is set up our client’s network:
- IP: 192.168.0.10
- Subnet mass: / 24
- Liaison door 192.168.0.1
- DNS 192.168.0.1
Both cards (Internal server and Windows client) must be in internal network for communication.

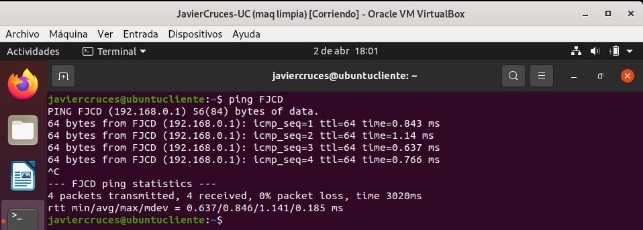
Once the card is configured, we will do a ping to the server to check the connectivity:

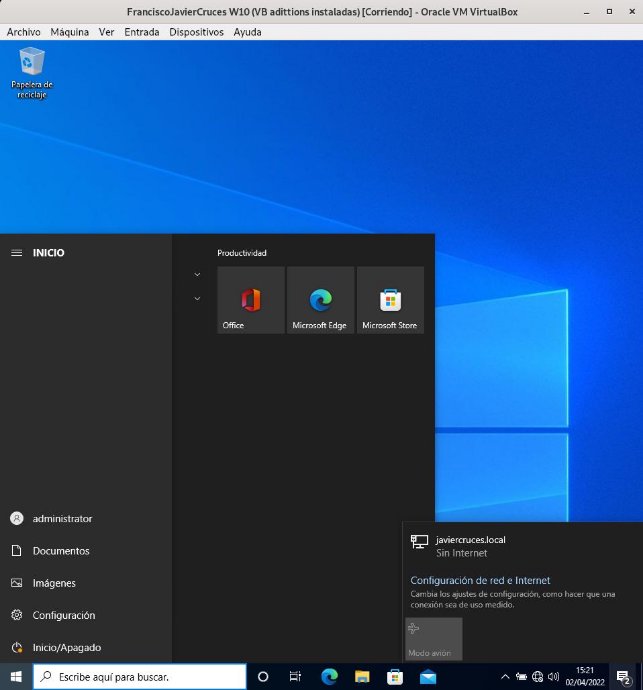
Now we access control panel → system and security → system → advanced system configuration → team name → network id. We select the first option to join the domain

We will select the first option, as our network has a domain:

We will now need to enter the data of the administrator user and the name of our domain:
The administrator user that is created by default in samba is called the administrator

Once you enter the data you will ask us if we want to create a domain account on this computer, I will select that no:

And for the changes to be applied, we must restart:

Once restart we can log in with the different users of our domain:
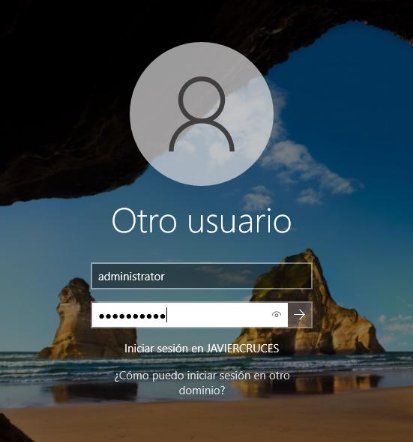
We can see that we can log into the team with the accounts of our domain:
Linux client
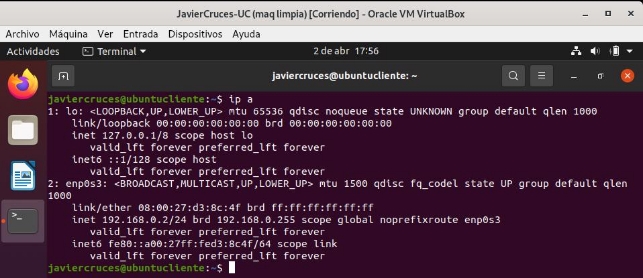
The first thing is to set up the network, for which I have assigned the IP address 192.168.0.2
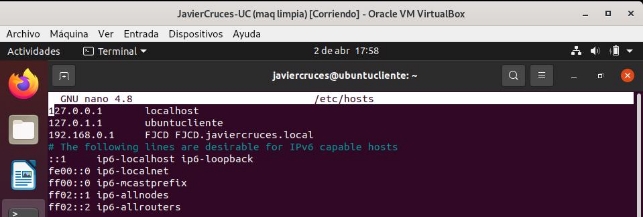
We will now have to add to our server in the host file, a line in which the IP address of our server will go followed by the name of this server and the full domain name of our server:
To check this change we have made we will do a ping to the server using its name:
We will now update the equipment to download the latest versions from the repositories:
To have the Internet on the client I have previously configured NAT on the server.

Once the system is updated we will install the following packages:
- sssd (System Security Services Daemon): Manages authentication mechanisms and access to remote directories. It replaces the classic Winbind with more speed and stability.
- heimdal-clients: This is a free implementation of Kerberos 5 created with the intention of being compatible with the Kerberos protocol implemented by the MIT.
- msktutil: The utility of Kerberos’ keytabs in a Microsoft Active Directory environment.
We can do it with 1 command:

As we install you will request the name of our active directory server so we enter it:

Now you will ask us the name of the computer that acts as a server in our case is:

Finally, he will ask us about the administrative server that in our case is the same:

Once this is done, the installation will continue without having to enter more data.
Now let’s add additional data to Kerberos to make sure it behaves properly. We will start by changing the name of the configuration file, so that we can return to the original parameters if necessary:

We will now use nano to edit the file settings, it will be empty so we will add the following:
Once filled in with our domain data, we save the files and check if we can log into the domain:

If the output does not offer us any error, it is because the authentication process has worked properly.
We will proceed to join the domain, for this we will use the following command:

This command will have to be completed according to the data of our domain, in case we do not get any output, we will have joined the domain.
To complete the task, we will remove the kerberos authorization tickets that we activate when running kinit. To achieve this, just use the kdestroy command.

Share folders
#7. Personal folders are needed on the server for each user. There will also be a folder for each group, to which only the members of each group can access and write.
We will create the directories in the root partition for each user and one for each group. These will be created by the name of the group or user:

We have to bear in mind that the samba users we have generated at the beginning of the document have been removed when installing the domain and we will have to produce them again.
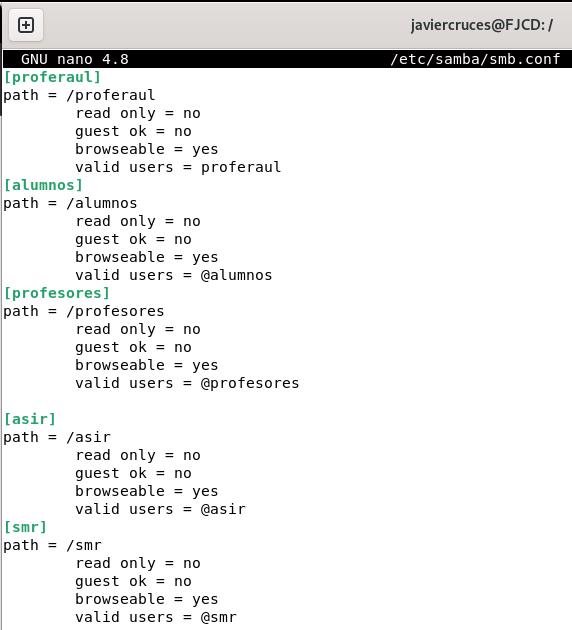
We will share these folders through samba, for this we edit the / etc / samba / smb.conf file:

To indicate that you can access a group we will have to put an @ in front of the group name:
We would only be able to correctly assign the appropriate local permissions for our resources and change the folder owners so that users can write on them:

This would be the right thing to do, but if we assign you the 775 permissions we can’t write in the folder, so we’ll assign you all the permissions:

Now we’ll repeat this with all the directories, first I’ll give you the permissions:

And finally we will change the folder owners and make each user or group their respective owners:

Let’s make sure we have applied these changes correctly:

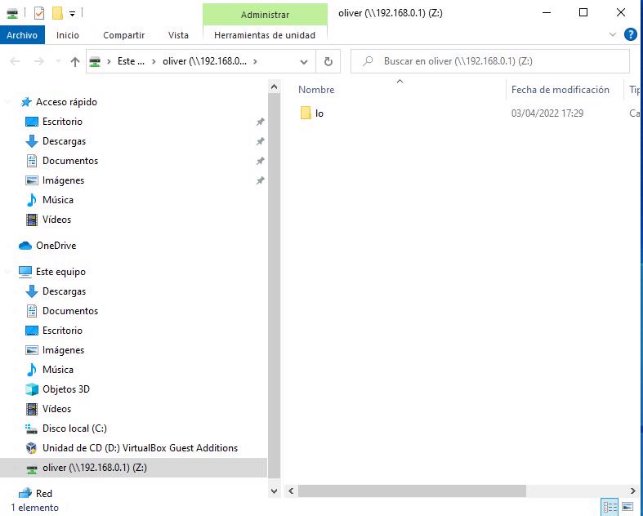
We will check that we can access the shared resources from the olive user, we will access the Oliver folder and create a directory within:

8. From Windows access these folders through network drives.
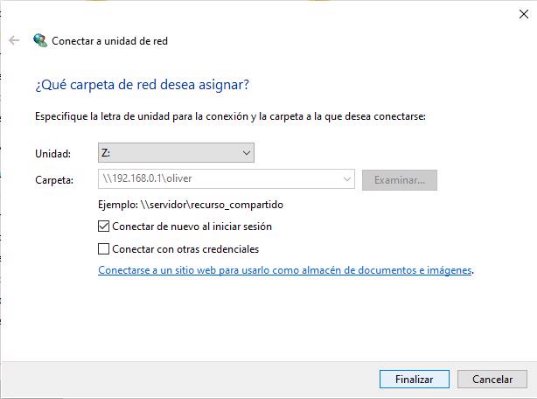
From the file browser we can see all the shared resources on the network. Now we will create network units, so for example we will add the Oliver folder to the Oliver user as a network drive, for this, we right click on the folder > connect to network drive:

And we will select a letter to assign to the network unit:
Now this unit will appear on this team:
Mobile profiles
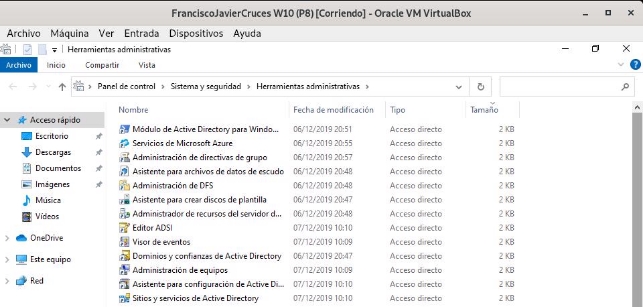
9. Define mobile profiles on the Linux server using Samba, so that users can authenticate on different Windows machines, maintaining their configuration. To do this we will install RSAT (Remote Server Administration Tools) that will allow us to manage our samba domain controller identical to windows server.
To add them we will search the search for Windows * * * Add optional features * * once here we will give you to add feature:

Once here we will look for the following features with RSAT and install them:

Once installed we will be created an application similar to that of a Windows server called administrative tools:

We will be opened a folder with the management tools:
And we will search for user management and active directory equipment or write in running dsa.msc, this we will do with the user managing our domain to be able to access this:

Before creating our mobile user we will create a network resource as we have previously done called profiles and we will give the mobile group permission to write on them:

For our user to write in this directory we will add it to the group:

Now we go to the configuration of our user and we change the profile path. We will put the path of our shared folder profiles followed by * *% username% * *:

We kept and we would have made our mobile profile created.
We will demonstrate the operation of the mobile profile, for which I have changed the background and created two folders:
Now let’s log in and start it on the Windows on the right:
We see that the mobile profile has been properly performed.
NFS
10. Through NFS, folders: projects, documentation, programs _ and _ drivers will be shared on the server. The first can only be read; the last two can also be written. Linux equipment will automatically mount the folders in the boot.
The first thing we will do is install the following packages:

Now we’ll create in the root the directories we’re going to share:

And we’ll change the owner and the permissions to these directories:

After this, we must edit the / etc / exports file. This is the file where the folders we are going to share are indicated to NFS. The first one will be read only and the last two can be written:

To access these resources on the server we will install the following packages:

Now we will create the directories where we will mount our folders:

To manually mount them in Linux we will do the following command:

Let’s check that in projects we can’t write:

While in the other two we can write:


If we want to access these resources in Windows – >\ 192.168.0.1\ documentation

\ 192.168.0.1\ projects (reading only directory)

\ 192.168.0.1\ programs\ _ and\ _ drivers

To view them you need to have the following features installed in Windows (We can access this program through the Windows search engine by writing Windows features)

To end with this point we will set that Linux equipment automatically mount when you start the directories. We will edit the / etc / fstab file by adding the following lines:

Once this is done we will reboot and we will see that we will have been automatically mounted:

Quotas
#11. The server / home folder will have a quota system to avoid saturation with user files (100 MB per user).
The first thing we will do is install the packages to implement quotas:

We will now allow the shares in the partition / home by adding this to the fstab of our server:

We take the home partition to apply these changes:

And we apply quotas on the partition / home

We will check that at the root of the partition we have been created two files (afuca.group and afuca.user):

We will now apply the 100Mb quota to olive using edcupa:


We will now use a tool which is * gawk, * which will allow us to focus on this command, apply the quota we have just created for Oliver to all our users:

The order we just launched has drawn a list of all users and has applied Oliver’s quota to all users with an ID greater than 499.
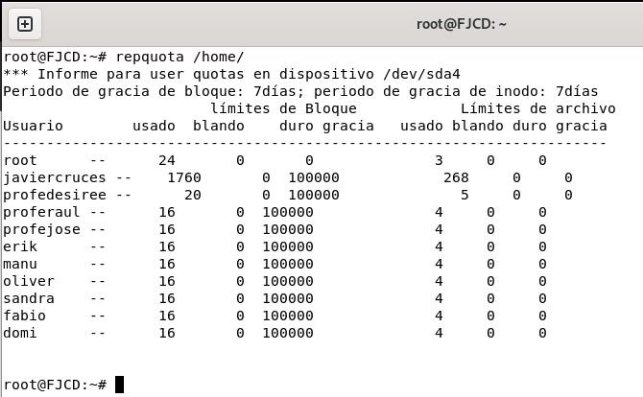
We will now review the quotas to see how they are:
To check that it works we will exhaust the proferaul user’s share, for this we will create a 30 MB file:

Now we’ll move him to the home directory of him and make him the owner of the file:

We see that the space used in the user directory is updated:

Webmin
#12. Install Webmin on the server to have the possibility to manage it graphically from a client. Show some of your functionalities.
Webmin is a modern web control panel that allows you to manage your Linux server through a browser-based interface.
We will need to install apache to be able to install webmin on our server:

We will now have to add the webmin repository, so we will edit the sources.list and add it:

We save the file and make an apt update to update the repositories, we will be wrong warning us that the repository is not reliable.
So now we will download the PGP key from Webmin and add it to our system:

We go back to making an apt update and see that now the repository is reliable
Below we will download the webmin package:

The latest lines of the installation will give us the data to access this service web:

So in a client we go to the browser and access this url:
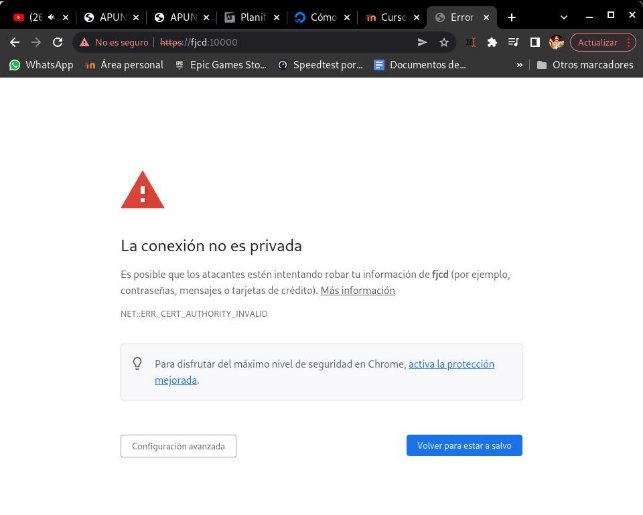
It will tell us that the connection is not private, to skip this warning Advanced configuration > access

We will have a portal where we will need to enter with an administrator user of our server:

The first thing we will see on the web interface will be a resource monitor, as well as data from our team:
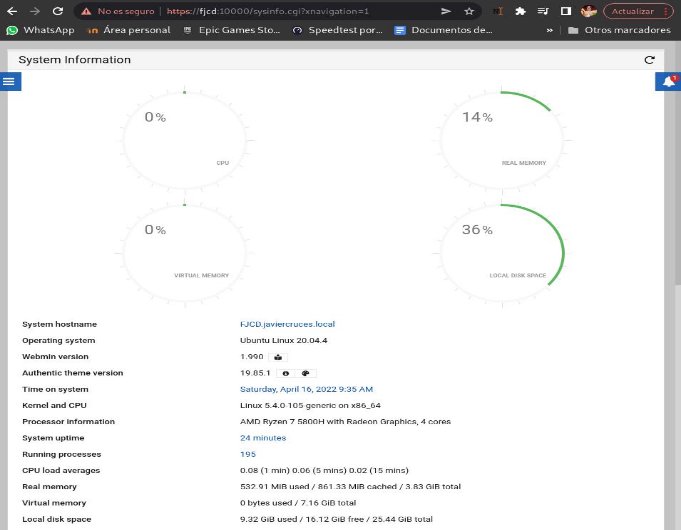
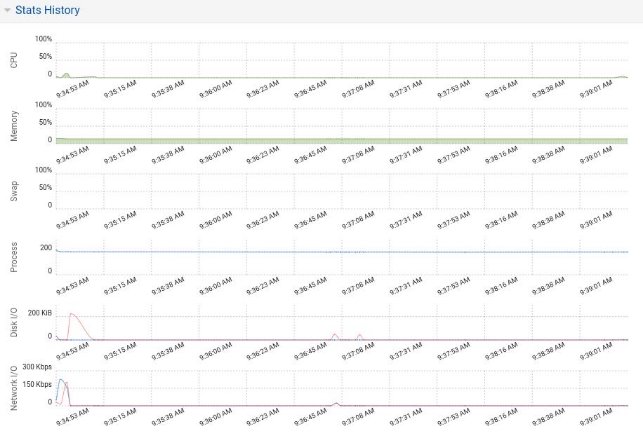
We will see a resource monitor history, which will show us the hours and percentage of use of our hardware, as well as system information:
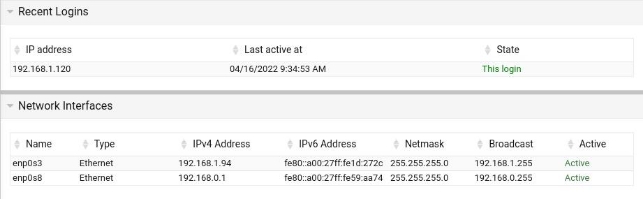
We have more sections such as recent login or network interfaces, which will give us information about who has connected and their settings respectively:
To end with the panel we will have a last window which will tell us the use of the disk and partitions:

Once we have taken a look at the main page we are going to take advantage of a functionality that has to allow us to view the directories shared by nfs, to access here we are going to networking > NFS exports:
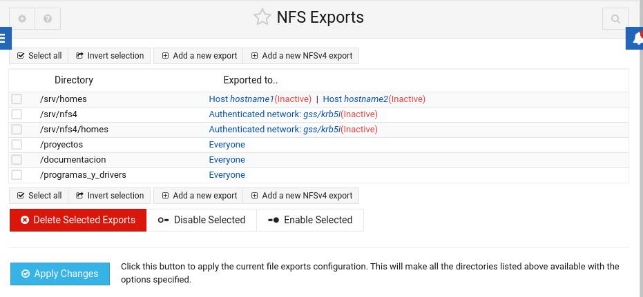
Come on, it also allows us to edit the current shared directories as well as add or delete these.
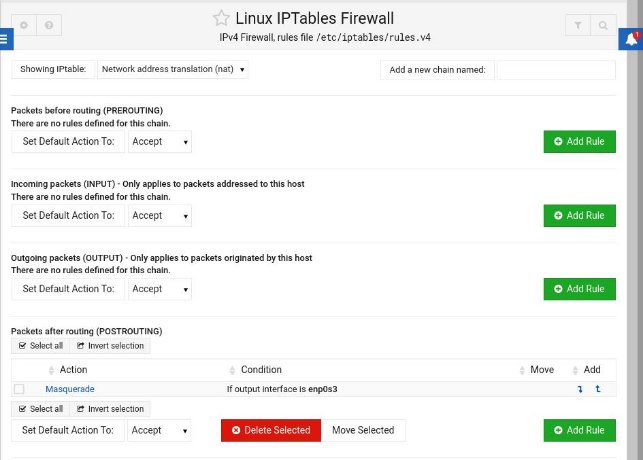
In addition, this tool allows us to set up a Firewall with iptables, which is now of vital importance to have security on our network:
It even has a web terminal so that we can manage the server from a client, to access it we deploy the menu and click on the terminal symbol or we press Alt + K:

We see you using ssh with the user connected in the application, in my case javiercrosses:

Webmin includes many more management functions that help us work with the server in a graphic way to make it more friendly to manage it, from updating packages to setting up a Firewall. In addition, it uses https, so our traffic would travel encrypted, which would allow us to configure nat to be able to access from a device that is outside our network, without a snifer being able to decipher our traffic easily. It is advisable that we change the self-signed certificate that uses webmin to one of our own that we can generate with Let’s encrypt, for example.
CUPS
#13. There will be a CUPS printing server, which will be administered from a Ubuntu client. The first thing we need to do is install on the cup server:

Once this is done we will configure the service to allow to be managed from our Ubuntu client, for this we edit the following file:

We will now add the following parameters:
- Listen 192.168.0.1: 631
- allow 192.168.0.0 / 24
To allow our client Ubuntu to be able to manage the service

Now we’d only have to restart the service:
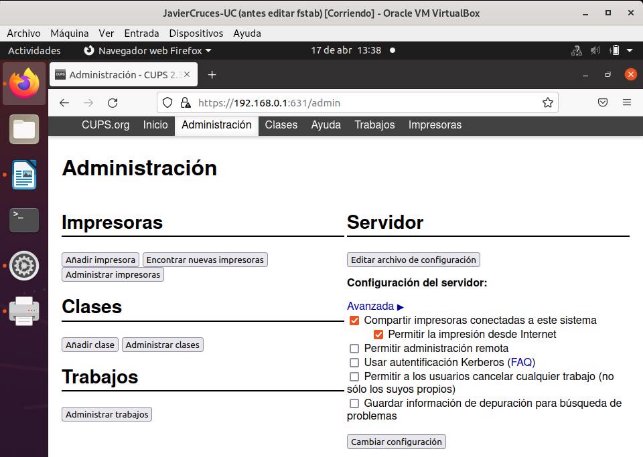
We will move to the client and in the browser we will enter the ip of our server followed by two points and 631:
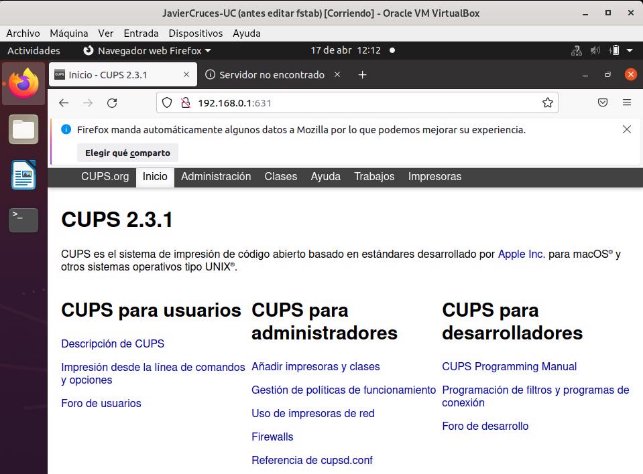
With this we have checked that the client can manage coups.
#14. Set up a network printer for all users, with daily page limits for all users.
To share our network printer, we access the web panel and in the management section we mark sharing printers connected to this system:
Before setting the limits we will enable the service to register the name of the users when sending files, for that in the cups.conf file we change this default value to none:

We will now restart the service:
To set a daily limit for each 20-page user for example, we would apply the following command for our printer.

Once this command has been applied, users will only be able to print the indicated number of pages, when they exceed the limit the works will be sent to cups, but it will remove them from the tail and will not print them:
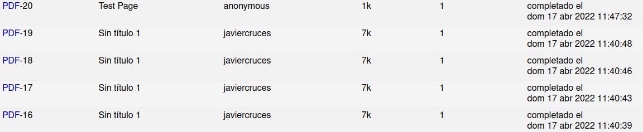
In other words, work 21 in this example will not be created until 24 hours.
Bibliography
- [How to know what desktop I have] (https: / / www.sysadmit.com / 2020 / 06 / linux-as-know-that-scriptorio@-@ tengo.html)
- [Mounting samba domain controller] (http: / / somebooks.es / create -a-controller-de-domino-de-active-directory-con-samba-en-ubuntu-18-04-lts /)
- [Configure the network with netplan] (http: / / somebooks.es / establish -a -direction-ip-estatica-ubuntu-server-17-10-posterios /)
- [Unite client linux to domain part 1] (http: / / somebooks.es / unir-a-cliente-ubuntu-20-04-a-a-domine-of-active-directory-over-windows-server-2019-part-1 /)
- [Unite client linux to domain part 2] (http: / / somebooks.es / unir-a-cliente-ubuntu-20-04-a-a-domine-of-active-directory-over-windows-server-2019-part-2 /)
- [Manage domain with RSAT] (http: / / somebooks.es / 12-7-administrar-el-control-de-domino-resara-con-rsat /)
- [Access shared folders w10] (http: / / somebooks.es / nfs-parte-6-acceder-a-la-carpeta-comparta-de-a-cliente-windows-10 /)
- [Contributions] (https: / / www.linuxtotal.com.mx / index.php? cont = info _ admon _ 018)
- [Installation and use of webmin] (https: / / www.digitalocean.com / community / tutorials / how-to-install-webmin-on-ubuntu-20-04-es)
- [CUPS Commands] (https: / / docs.oracle.com / cd / E26921 _ 01 / html / E25809 / gllgm.html)